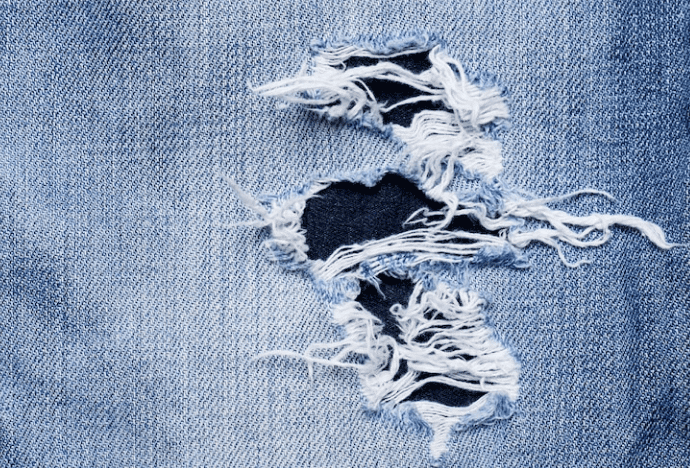
Distressing denim has become a popular trend in recent years, giving jeans a unique and worn-in look. There are various methods for distressing denim, but one of the easiest and most effective techniques involves using a cheese grater.
In this step-by-step guide, we will walk you through the process of distressing denim with a cheese grater, from preparing the denim to adding additional distressing techniques and finishing touches. By the end of this article, you will have mastered the art of distressing denim and be able to create your own personalised, stylish jeans.
Tools and materials needed for distressing denim
Before you begin distressing your denim with a cheese grater, you will need to gather a few tools and materials. Here’s what you will need:
- Denim jeans: Choose a pair of jeans that you want to distress. Opt for jeans with a medium to heavy denim weight, as lighter-weight denim may not hold up well to distressing.
- Cheese grater: Look for a cheese grater with a medium-coarse grating surface. Avoid using a grater with a fine grating surface, as it may not create the desired distressed effect.
- Chalk or fabric marker: This will be used to mark the areas of the denim that you want to distress. Choose a color that contrasts with the denim to ensure visibility.
- Sandpaper (optional): If you want to add more texture and depth to your distressed denim, you can also use sandpaper in conjunction with the cheese grater.
- Scissors or utility knife (optional): These tools can be used to create additional distressing effects, such as frayed edges or small rips.
Step 1: Preparing the Denim
Before you can start distressing your denim with a cheese grater, it’s important to prepare the denim by washing and drying it. This will remove any sizing or chemicals that may interfere with the distressing process. Follow these steps to prepare your denim:
- Turn the jeans inside out: This will help protect the outer surface of the denim from excessive wear and prevent any accidental distressing on the wrong side.
- Machine wash the jeans: Use a regular cycle with cold water and a small amount of mild detergent. Avoid using fabric softener since it can leave a residue that can interfere with the distressing process.
- Air dry or low heat tumble dry: After washing the jeans, air dry them or tumble dry on a low heat setting. Avoid high heat, as it can shrink or warp the denim.
- Iron the denim (optional): If the jeans are wrinkled after washing, you can iron them using a low heat setting. Be sure to iron both sides of the denim to ensure it is smooth and ready for distressing.
Step 2: Marking the Areas to Distress
After the denim is prepared, it’s time to mark the areas that you want to distress. This step is important to ensure that you achieve the desired distressed look and avoid over-distressing.
Follow these guidelines to mark the areas on your denim:
- Put on the jeans: Wear the jeans and stand in front of a mirror to get a better sense of where you want the distressing to be. Consider areas that naturally experience wear and tear, such as the knees, thighs, and pockets.
- Use chalk or a fabric marker: Take the chalk or fabric marker and lightly mark the areas on the denim that you want to distress. Start with small marks and gradually increase the size and intensity as needed.
- Experiment with different patterns: Feel free to experiment with different distressing patterns, such as horizontal lines, vertical lines, or random patches. This will add variety and interest to your distressed denim.
Step 3: Distressing the Denim With a Cheese Grater
Now it’s time to start distressing the denim with a cheese grater. Follow these steps to achieve the desired distressed effect:
-
Place the Denim on a Flat Surface
Lay the denim on a flat and stable surface, such as a table or countertop. Ensure that the area you are distressing is easily accessible and supported.
-
Hold the Cheese Grater at a Slight Angle
Hold the cheese grater at a slight angle, with the grating surface facing down towards the denim. This angle will help create the desired distressed effect.
-
Rub the Grater Over the Marked Areas
Using moderate pressure, rub the grater back and forth over the marked areas on the denim. Move the grater in different directions to create a natural and random distressed pattern.
-
Check the Progress Frequently
Stop and check the progress frequently to avoid over-distressing. The denim should start to show signs of wear and fraying but should not be completely shredded or torn.
-
Adjust Pressure and Angle as Needed
If you want to achieve a more intense distressed look, increase the pressure and angle of the grater. If you prefer a more subtle effect, reduce the pressure and angle.
Step 4: Adding additional distressing techniques
While distressing denim with a cheese grater can create a beautiful distressed effect on its own, you can also enhance the look by incorporating additional distressing techniques.
Here are a few techniques you can try:
If you want to add more texture and depth to your distressed denim, use sandpaper in conjunction with the cheese grater. Rub the sandpaper over the distressed areas in a circular motion to create a subtle worn-in effect.
-
Scissor or knife-distressing
For a more rugged and edgy look, use scissors or a utility knife to create small rips or frayed edges. Be careful when using these tools, and start with small cuts, as it’s easier to add more distressing than to repair excessive damage.
-
Bleach or Fabric Dye Distressing
If you want to experiment with colour, you can distress the denim using bleach or fabric dye. Dilute bleach with water and apply it to the distressed areas using a sponge or brush. For fabric dye distressing, follow the instructions on the dye package and apply it to the distress areas.
Step 5: Washing and finishing the distressed denim
Once you are satisfied with the distressed look of your denim, it’s time to wash and finish the jeans. Follow these steps to ensure that your distressed denim looks its best:
- Turn the jeans inside out: As before, turn the jeans inside out to protect the distressed areas during the washing process.
- Machine wash the jeans: Use a regular cycle with cold water and a small amount of mild detergent. If you added bleach or fabric dye, use a color-safe detergent.
- Dry by air or use a low-heat tumble dryer: Dry the jeans by air or use a low-heat tumble dryer after washing. Avoid high heat, as it can shrink or affect the distressed areas.
- Iron the denim (optional): If the jeans are wrinkled after drying, you can iron them using a low heat setting. Be cautious when ironing over the distressed areas, as excessive heat can flatten or damage it.
- Enjoy your distressed denim: Once the jeans are dry and wrinkle-free, they are ready to be worn and enjoyed! Pair them with your favourite top and accessories for a trendy and personalized look.
Conclusion
Distressing denim with a cheese grater is a rewarding and creative DIY project that allows you to customise your jeans and create a unique and stylish look.
You may master the art of distressing denim and get the desired distressed effect by following the step-by-step instructions and using the tips and tricks provided. Remember to experiment, to be patient, and to enjoy the process. Whether you’re a seasoned DIY enthusiast or a beginner, distressing denim with a cheese grater is a fun and accessible technique that anyone can try.


