Leather is a natural material that has been used by humans for centuries. It is strong, durable, and stylish, making it a popular choice for furniture, clothing, and other accessories. But how is leather made? We will take a look at the step-by-step process of making leather. We will also explore the different types of leather and the various methods used to produce it. So whether you are interested in learning how to make your leather products or just want to know more about this versatile material, read on!
Table of Contents
- What is leather and where does it come from?
- How Leather is Made: A Step-by-Step Guide
- Prepare raw materials
- Tanning Leather
- Vegetable Tanning
- Chromium Tanning
- Combination Tanning
- Retanning
- Drying
- Dyeing Leather
- Finishing
- Inspection
- Wrapping it up with leather
What is leather and where does it come from?
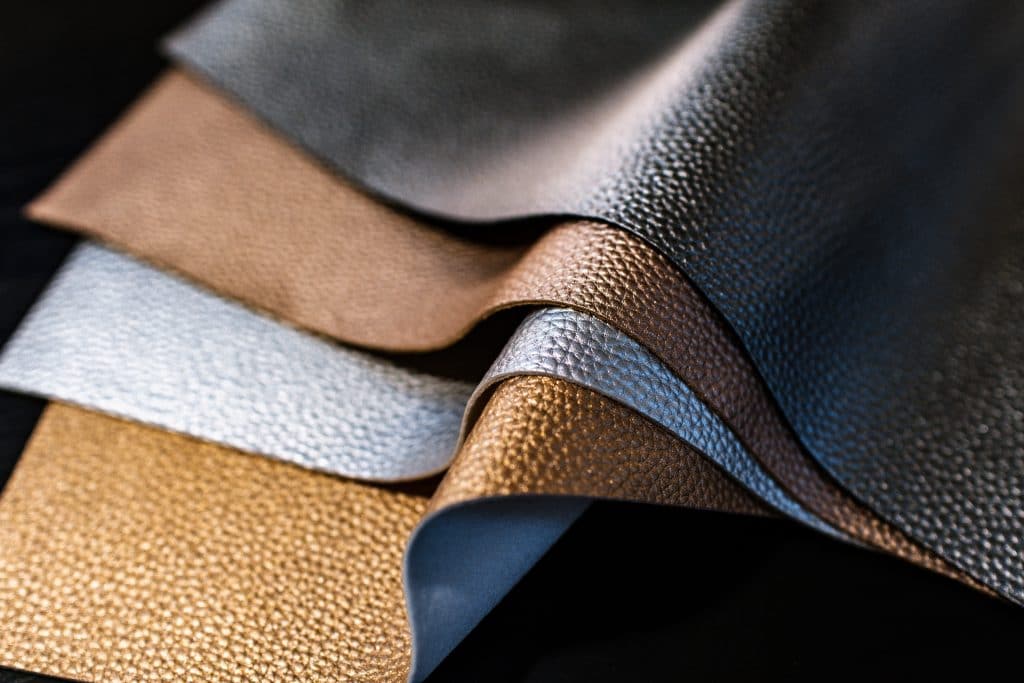
Leather is a material that is made from the skin of animals. It is typically made from cows, although it can also be made from other animals such as pigs, sheep, and goats. The leather is then tanned, which is a process that preserves the skin and makes it more durable. Once it has been tanned, the leather can be used to make a variety of products, including clothing, shoes, bags, and furniture. So let’s go a little deeper into the process of manufacturing leather.
How Leather is Made: A Step-by-Step Guide
The process of making leather has changed and evolved, with various methods being used throughout history. The modern process usually involves seven distinct phases, as we will explore in more detail below.
1. Prepare the raw materials.
Raw animal hides are the starting point for leather production and are generally purchased from a supplier. To keep them fresh, these hides may be packed in rock salt and left for as long as 30 days. This first step of leather-making has stayed virtually unchanged since humans first started to make leather.
The next step is to remove salt from the hides by tumbling and hammering them. You may also soak the hides in drums for a few days to hydrate the material and get rid of any leftover salt or dirt.
After animal hides are removed from any remaining hair or flesh, they are then softened and treated to increase their durability.
A splitting machine cuts the hides into two layers at the end of the preparation process.
The bottom of the animal’s hide is used for cheap, lower-quality leather while the top of the hide is used for higher-quality, full-grain leather.
2. Tanning the Leather
The second stage of leather-making, known as tanning, is responsible for preserving the hide and preventing it from decomposing.
Primary tanning is the process of halted deterioration and transformation of pre-tanned hides into leather.
The hides are first placed in a tanning drum with either chromium salt or vegetable tanning chemicals. This process can take up to eight hours, after which the hide will be both preserved and softened. Following that, fatliquoring adds natural bovine oils to the skin material, giving it strength and suppleness.
After that, the fat-liquoring process adds natural bovine oils to the skin material, making it stronger and more flexible.
Skins are shaved down to a specific thickness that is determined by the final product’s quality. Once they have been shaved, craftsmen check to make sure the skins are all even in terms of thickness.
There are 3 different types of leather tanning
● Vegetable Tanning
The vegetable tanning process uses natural chemicals to turn rawhide into leather, unlike the chromium method which is more commonly used. The most common vegetative components are mimosa, chestnut, and bark.
● Chromium Tanning
Chromium tanning is a synthetic process that gives the skin material being tanned a delicate and mellow suppleness.
● Combination Tanning
The combination tannage technique produces full-bodied, soft, and supple leather by combining chromium and vegetable tanning.
3. Retanning
After the first tanning step, another may be necessary to get the leather ready for its purpose. The process will be repeated with either a vegetable mixture or chromium salts (or both), and any excess moisture will be removed by pressure.
4. Drying
The next step is to dry the hides. This can be accomplished by vacuum-drying, oven-drying, or air-drying. If you choose vacuum drying, simply place the hide on a level surface that is temperature-controlled and then cover it with a top to create a vacuum. The water is removed much more quickly with this vacuum, which results in a tight and smooth grain texture.
If we use the air-drying process, we hang the hides on an overhead conveyor that runs around the tannery until they are completely dry.
5. Dyeing Leather
Dyeing is the process of adding color to the leather. Tanneries use a variety of dyes to create any color from neutrals, like black and white, To vivid colors, like blue and red.
The computer-generated dyeing recipe assures both color accuracy and uniformity to save you time and energy.
We place the skins in dye drums for eight hours to allow the hides to absorb the color completely. Once the dyeing process is complete, the leftover liquid will be clear, and the skins can either air or vacuum dry.
6. Finishing
After the leather has been dyed, the next and final stage is finishing. During this process, the leather will be handled to ensure it is soft and flexible as well as shiny.
Finishing improves the appearance of grain defects, provides the desired level of gloss, makes the material softer and more pliable, and creates a surface that is easier to clean.
7. Inspection
To ensure high quality, the leather undergoes various tests, including dimensional stability, abrasion and fading resistance, and colorfastness.
Wrapping it up with leather
So now you know how leather is made. It’s a pretty fascinating process, and we hope you enjoyed learning a little bit about it. Have you ever used leather? What type of products do you think could be made with this versatile material?
And as always, stay tuned to our blog for more exciting posts on all things fashion and style!
